

How To Repair Holes In Hvac Ducts
How to Repair Torn or Damaged Ac Ducts
Bert spent 25 years working as a habitation-improvement and residential structure contractor in central Florida.
A damaged duct system greatly reduces a heating and air conditioning organization's energy efficiency. Ideally, every bit of conditioned air goes straight from the furnace to the living space. In farthermost cases, the energy lost from torn or damaged ducts far exceeds the cost of the repair materials.
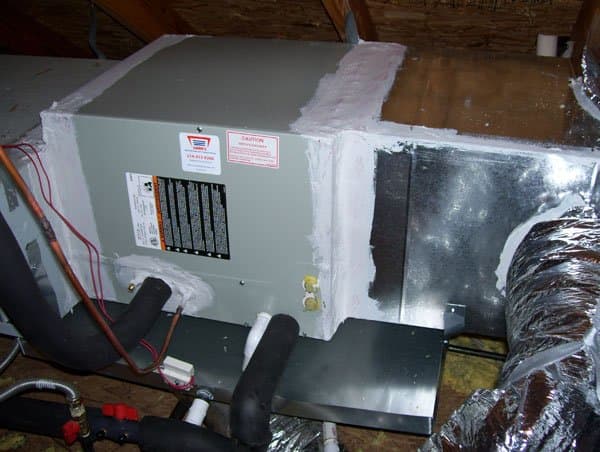
This ac unit's duct organization uses a galvanized canvass metal plenum with flex duct take offs.
https://world wide web.flickr.com/photos/jackiebese/
Types of HVAC Duct
All duct systems serve the same purpose. However, local building codes frequently dictate the type of material used, its installation method and its location.
(Before we get further, remember to always habiliment the appropriate personal protection equipment: such as a grit mask, eye protection, and gloves.)
- Galvanized sheet metal systems: These systems start with a rectangular trunk line or plenum. The system and then runs branch lines, made with either round sheet metallic or smaller rectangular ducts, to the individual floor penetrations. S-shaped clips and cleats, often called s-locks and drives, concur the pieces of sheet metal ducts together; screws hold round sheet metal ducts together. Installers use foil-backed duct record or sail metal compatible mastic to seal sheet metal duct. Some applications, such as cranium or enclosed systems, need insulation to forestall condensation while using air conditioning.
- Fiberglass duct board: This type of duct uses compressed fiberglass boards with a foil outer layer. A foil-backed duct tape, mesh, and duct sealing compound concur each joint together. Manufacturers offer 1-, 1.5- or 2-inch thick ridged fiberglass sheets.
- Flex duct: This like shooting fish in a barrel-to-install and cheap type of duct contain three layers: an inner layer that uses a spiral wire rib to hold its shape, a fiberglass center layer that provides thermal protection and an outer layer that acts as a vapor bulwark. When installing a flex duct, a technician slides the inner liner over a sheet metal collar. And then he seals the inner liner with a code-canonical duct tape and locks information technology in place with a large cypher tie or worm-gear clench, called a duct strap. Installers ofttimes support flex ducts every four feet. This limits sags and keeps connections from pulling away from the collar.
- Spider systems: A spider system utilizes a centralized plenum that feeds multiple co-operative lines. Nigh co-operative lines connect to a boot which delivers air to an interior room. Yet, when the system needs more than one plenum, a big branch line feeds each additional plenum.
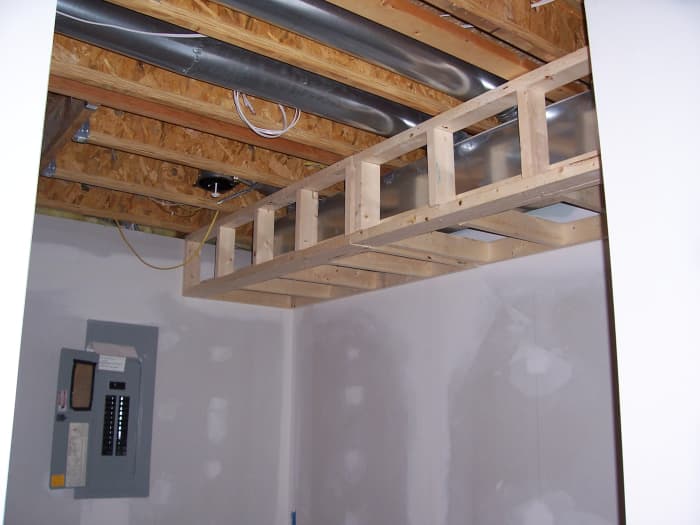
This canvas metallic duct organization runs between floor trusses.
By Paul Cutler from Chaska, United states (Flickr) [CC BY two.0 (http://creativecommons.org/licenses/by/2.0)], via Wikimedia Commons
Many homes located in northern climates use galvanized sheet metallic ducts. These ducts run through the floor joists. Heat radiating from these ducts helps warm the flooring. Occasionally the sealant loses its grip and allows heated air to escape.
- Betrayal the leaking seam: Loosen the hanging straps or brackets on both sides of the repair area. Lower the duct plenty to examine the leaking joint. Normally this blazon of leak only needs additional sealant; however, large gaps should exist completely exposed and inspected. If a missing or incorrectly installed South-lock acquired the large gap, take apart the articulation and reconnect correctly.
- Repair the S-lock: When applicable, slice the old mastic from the perimeter of the articulation with a utility pocketknife. Remove any screws holding in the S-lock in place. Straighten the tabs on the ends of both drives and pull them from the joint. Separate the joint. Normally tension prevents complete separation. Slip the old S-lock from the articulation. Open up the S-lock with a screwdriver and slide it back into place. The flat metallic on each duct end should slip into the S-lock gap, the gap created by the screwdriver. Install the drives with a hammer.
- Seal the duct joint: Encompass the articulation with a 1/viii-inch thick layer of code-canonical duct mastic, using a paintbrush to smear the mastic. Manufacturers make mastic designed specifically for galvanized sheet metallic ducts.
Cutting fiberglass duct board with a non-serrated knife.
https://www.flickr.com/photos/rusty_clark/
Fiberglass Duct Lath
Heating and air-conditioning duct systems using fiberglass duct board rarely demand maintenance or repair beyond an occasional interior cleaning. Professional duct-cleaning technicians use high-powered vacuums to evacuate grit buildup from the duct's interior surface. While this type of duct withstands moderate abuse, prolonged exposure to excessive moisture contaminates and destroys the fiberglass. Damp sections often dry out without any issues, however, due to mold concerns technicians often recommend replacing sections of saturated duct board.
Whorl to Go along
Read More From Dengarden
- Drain the duct: The fiberglass layer holds water like a sponge, and an intact foil backing prevents drainage. Place a saucepan under the duct and poke a small pigsty in the duct'south foil outer liner with a screwdriver. Keep the bucket under the duct until information technology stops dripping.
- Cutting out the damaged department: Forcefulness a not-serrated knife blade through the duct and cut out the moisture area. Use in and out motions. The notches on a serrated knife grab the foil backing'southward reinforcement threads, the triangle-shaped lines visible on the outside of the duct.
- Create a replacement patch: Either employ the old department as a template or measure the opening with a tape measure and transfer the measurements to a new sail of duct lath. Cut the duct board with a non-serrated knife.
- Install the patch: Insert the patch into the pigsty and press on the patch until its foil backing sits affluent with the existing duct's surface. Apply a piece of foil-backed duct tape to the seam, keeping the eye of the tape centered over the seam. Press the record with a squeegee. Encompass the tape with a slice of mesh. Coat the mesh with a one/8-inch thick layer of duct mastic, using a paintbrush as an applicator.
Repairing Other Types of Air Duct Systems
Many duct board systems need the seam around the air handler or furnace repaired or sealed. This normally occurs when the installer neglected to wipe all of the manufacturing oil and droppings from the air handler'south surface, or he failed to seal effectually the entire outside perimeter of the plenum.
- Remove sometime sealant: Cut away the old sealant, mesh, and tape with a knife. Wipe the exposed connexion with a rag, removing any debris or oil.
- Replace missing or damaged insulation: The duct board insulation must bear on the furnace. Otherwise, condensation forms and becomes a breeding ground for mold and mildew.
- Encompass the joint with foil-backed duct tape: The tape should bail the plenum to the furnace.
- Apply mesh: Cover the duct tape with mesh. In tight spaces use a paint stick to press the mesh against the tape.
- Seal the joint: Employ a one/8-inch thick layer of duct mastic to the mesh with a paintbrush. Attach a paint stick to the brush's handle to reach hard to go to areas. Let the mastic harden, using the manufacturer'southward recommended dry out fourth dimension, then plough on the air handler and use a hand to experience for drafts.
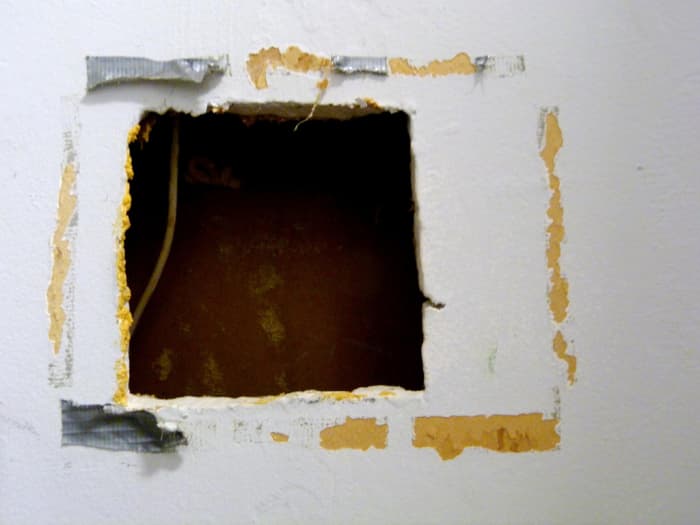
In sure situations, such every bit when the home's design places the air-handler or furnace in a modest closet, a tight space prevents the installer from sealing portions of the duct's outer surface. In these cases, the installer must open an access hole and seal the joint from the inside. When doing this, utilise caution to avoid dripping mastic onto the system's evaporator whorl.
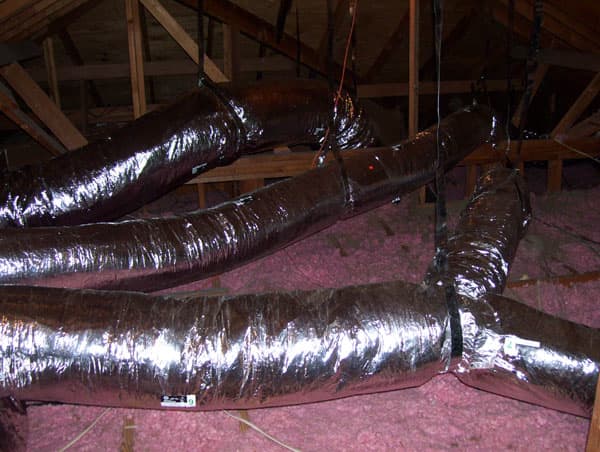
This air-conditioning organization uses single pieces of flex duct to bridge across the attic
https://www.flickr.com/photos/jackiebese/
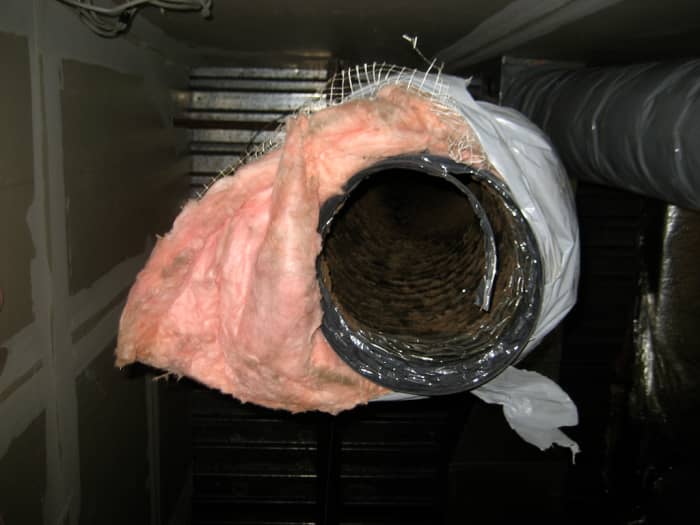
Flex Duct
Occasionally a home inspection reveals an exposed air-conditioning duct collar. This happens when pressure level forces the outer liner and insulation away from the collar. The exposed collar greatly reduces the system's energy efficiency.
- Solve the effect causing the exposed collar: Add a hanger strap next to the slipping connection, relieving any tension. Place boosted hanging straps throughout the duct run.
- Disconnect the loose liner: Cutting the duct strap with wire cutters or pliers. Pull the insulation abroad from the connexion. Conform the outer liner, then it properly covers the insulation.
- Attach the outer liner: Apply mastic to the outer layer's butt edge. Slide the connection together and mash the material together until the mastic seals the connection, then lock it in place with a duct strap. Cover the exterior of the joint with mastic.
Some other common type of air conditioning duct damage is torn flex. Tears in the outer liner often happen when an installer drags a department of flex duct beyond roof trusses, and the outer liner catches on a blast or truss connector plate. Unremarkably, the installer notices the damage and repairs it. However, occasionally the damage slips through the inspection and afterward the warranty menstruum the problem becomes yours.
- Shut the outer liner'due south rip: Shut the center of the rip with a half-dozen-inch section of duct tape. Seal each side of the rip with duct tape, starting at the center and working out.
- Seal the repair: Apply a slice of mesh beyond the length of the repair. Embrace the mesh with duct mastic. The mesh holds the mastic together, which prevents cracks subsequently it drys.
A knife cuts the flex duct's three layer and wire cutters snips the wire rib.
https://www.flickr.com/photos/peretzpup/
Replacing Flex Duct
In certain situations, such equally a crushed duct or animal damage, it makes more sense to replace a section of flex duct than it does to repair it. The new section uses the original arrangement'due south duct collars and hangers. The cost of materials and the location of the repair brand this determination.
- Remove the damaged flex: If disassembling a flex connection, peel away the old duct seal and cutting the duct strap. Pull the insulation abroad from the connecting, exposing the inner liner. Remove the duct strap and record holding the liner in place. Carefully slide the damaged duct off the collar. Skip to step three. When removing a small department of flex duct, technicians slice through the duct with a pocketknife. The blade cuts all three layers at once and follows the inner liner's wire rib around the perimeter. Remove the knife one time information technology makes a full revolution, snip the wire rib with wire cutters.
- Install a Splice Connector: Fold the existing duct's outer liner over the insulation and slide information technology between the insulation and inner liner, leaving nigh 4 inches of the liner exposed. Slip a splice collar into the end of the duct's inner liner and wrap the connectedness with duct record. Lock the inner liner against the splice collar with a duct strap. Push the collar into the duct until the collar's rib rests flush against the insulation roll.
- Summate the length of the replacement section: Measure the distance between the existing ducts' collars and add ii anxiety. Increase this calculation an additional one pes for each bend.
- Cut the new flex to the advisable length: Stretch out the new flex duct to its full length. Coil the outer liner over the insulation and tuck it between the insulation and the inner liner. Measure from the end of the insulation roll to the appropriate place on the duct and cutting with a knife. Gyre the outer liner over the insulation.
- Install new flex: Slide the inner liner over the splice neckband, leaving almost 1 inch of the collar exposed. Seal the connection with code-approved duct tape. Slip a duct strap over the inner liner and tighten it with the advisable tool. Butt the new section's outer liner and insulation confronting the existing ducts. Lock information technology in identify with a duct strap. Seal the joints with duct tape or code-canonical mastic.
This article is accurate and true to the best of the author's noesis. Content is for informational or amusement purposes just and does not substitute for personal counsel or professional advice in business, financial, legal, or technical matters.
© 2022 Bert Holopaw
Related Manufactures
Source: https://dengarden.com/home-improvement/How-to-Repair-Torn-or-Damaged-Air-Conditioning-Duct
0 Response to "How To Repair Holes In Hvac Ducts"
Post a Comment